

How To Check Fan Speed Windows 7
One of the main reasons a PC overheats is internal fans non operating at required speeds. This is often due to the automated fan controller not functioning correctly. Luckily, you lot can adjust your fan speeds manually using a few dissimilar methods. Manually adjusting your fan speed is also an essential step in overclocking a CPU. This guide covers how to manually adjust your CPU fan likewise as any other case fans.
Fan types
Before making any adjustments, you'll need to check what blazon of fans you have. CPU fans volition ever be adaptable, but other fans in your PC may not be and so flexible. The easiest way to identify a fan is to check the connector. There are three types of fans: Molex, DC, and PWM.
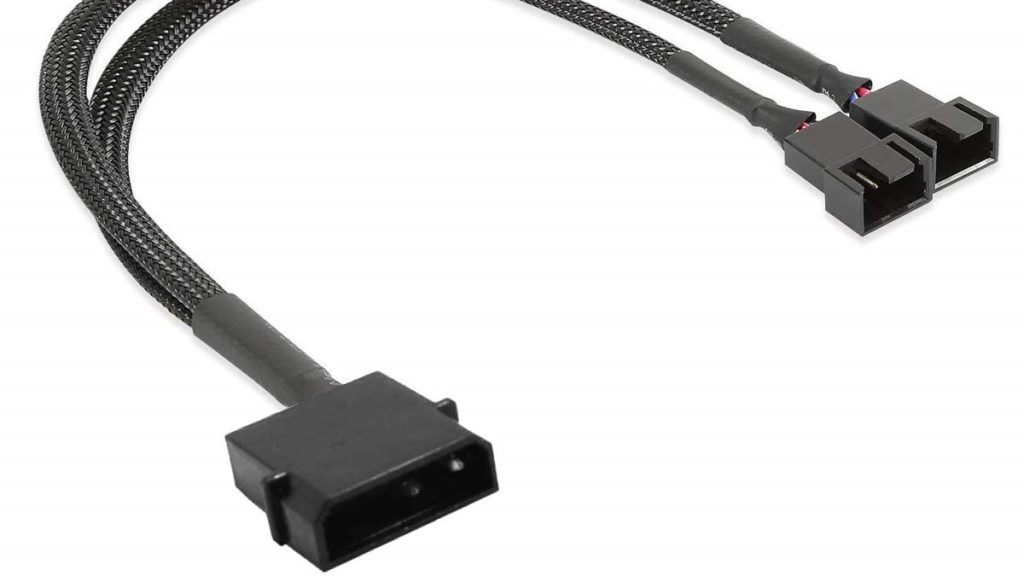
Molex fans
Molex fans are characterized by their apartment iv-pin connectors and their directly connexion to the power supply. Unfortunately, because these fans bypass the motherboard, Molex fans are impossible to adjust manually.
PWM and DC fans
On the other hand, you tin can manually adjust the two remaining fan types, which are DC and PWM. To spot a PWM fan, look for a connector that is small, 4-pinned, rectangular in shape, and plugs directly into the motherboard.
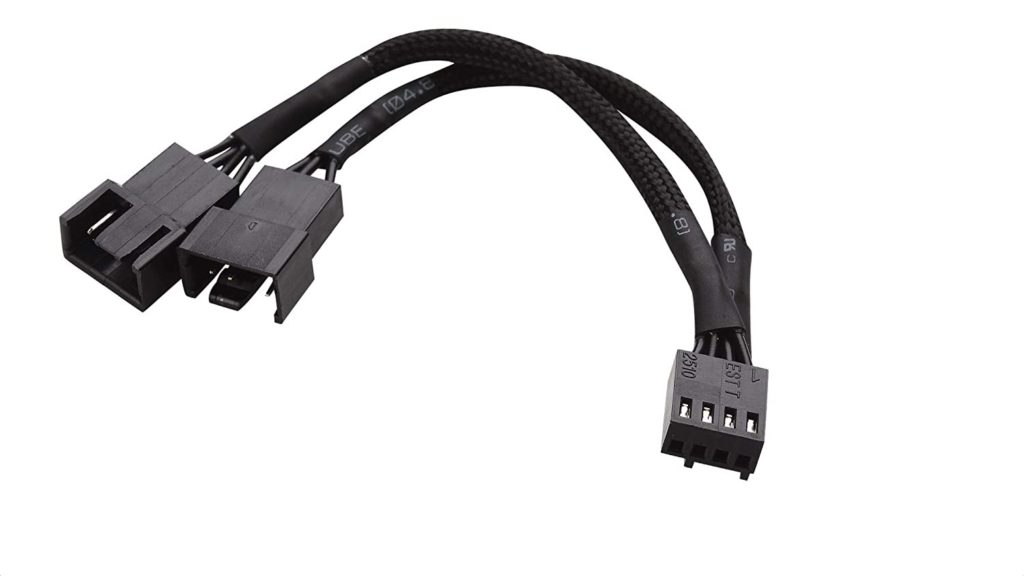
DC fans are almost identical to PWM fans with one exception. DC fans have a iii-pin connector instead of a 4-pin. The actress pin in PWM fans makes them more than ability-efficient, giving the fan better performance. That being said, you can adjust PWM to run in DC manner, but it's not recommended and is a downgrade in most cases.
How to adjust fan speeds using your UEFI
The best way to adjust your PC's fan speeds is through the Unified Extensible Firmware Interface (UEFI). Of course, every UEFI is different, simply the steps listed below are similar on every motherboard.
- Reboot your computer and enter the UEFI.
- To enter the UEFI afterward restarting, look for directions on your boot screen that detail what key to press to access the UEFI. About usually, the F2 or Del fundamental will exercise the trick.
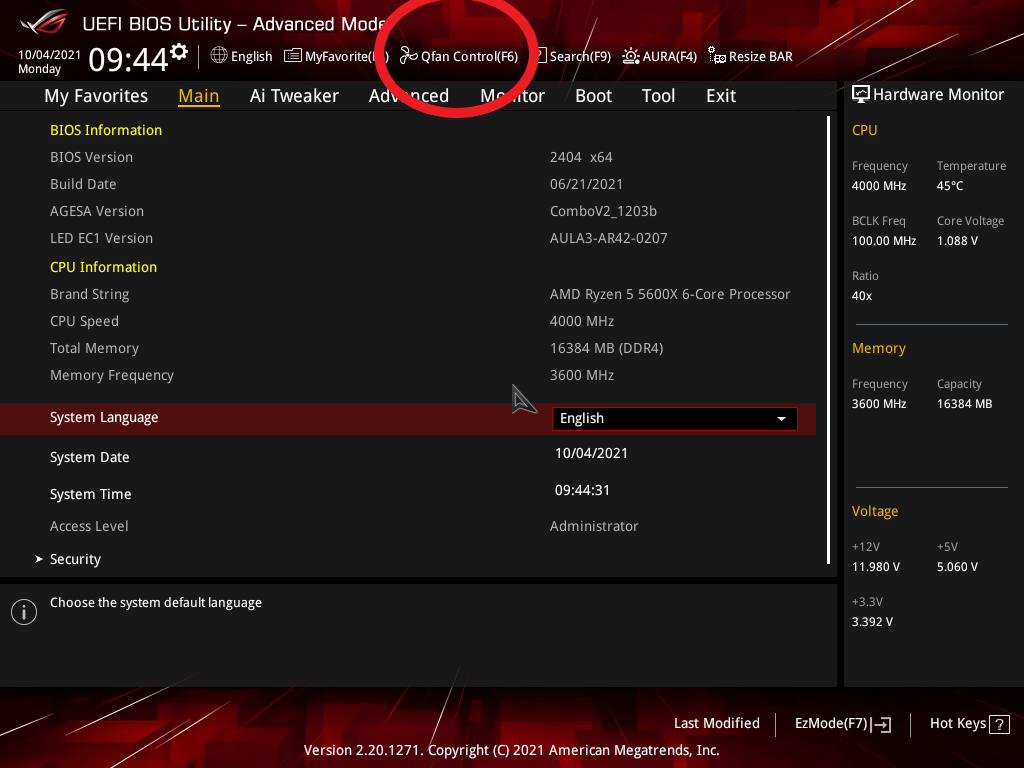
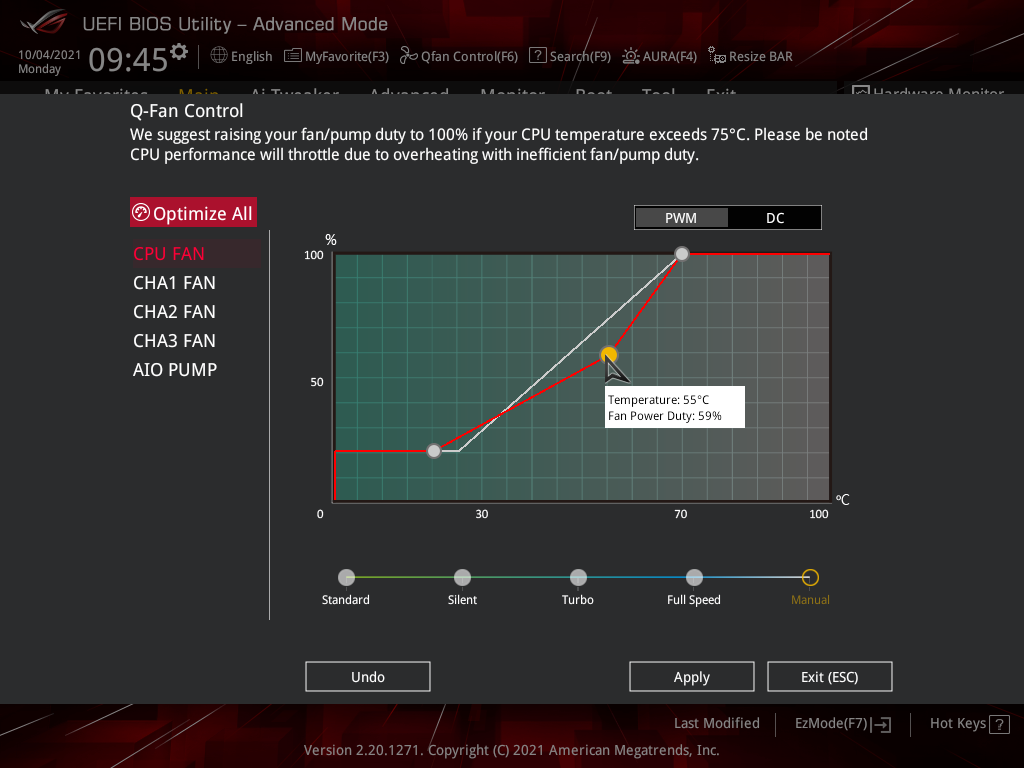
- In the UEFI, locate the setting in the chief menu called Smart Fan Mode, Manual Mode, Qfan Command, or something similar.
- You'll know you are in the right place when you see a list of fans and a bend graph.
- Once you've located the fan bend graph, choose the fan you lot want to command and change the Fan Manner to Manual.
The fan curve can look confusing at first, but it's simple once you get the hang of it. On the left side of the graph is a number denoting the fan speed, and below the graph is the temperature in celsius. When the temperature inside the instance reaches the designated temperature, it will cause the fan speed to increase.
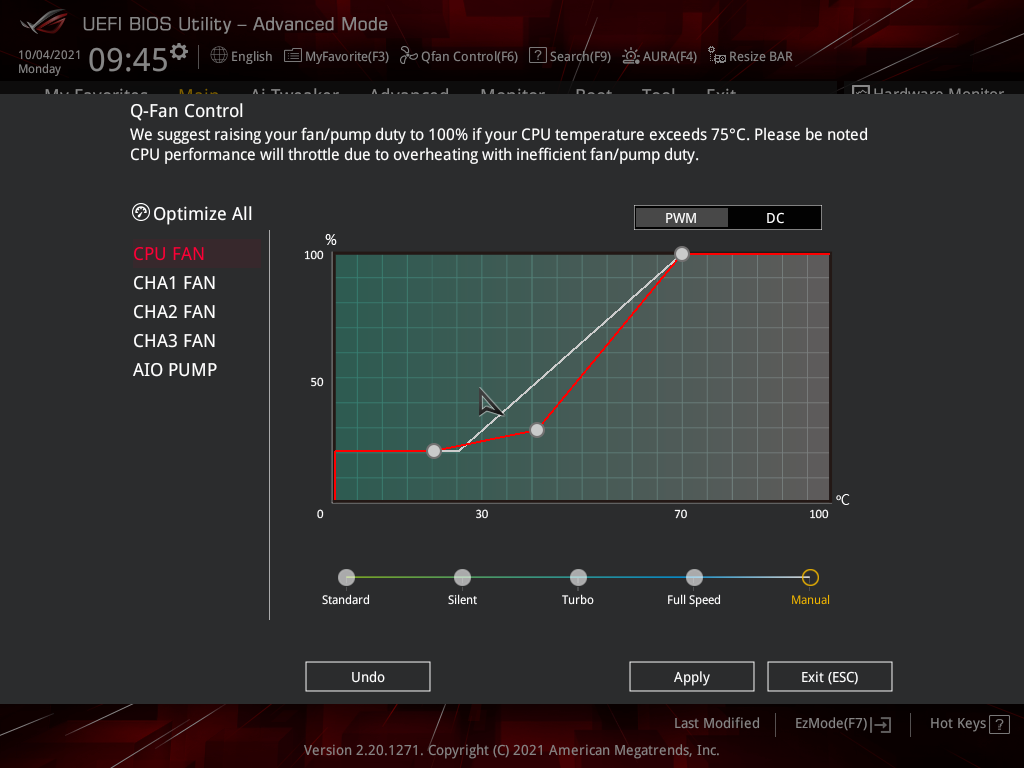
- Now, edit the dots on the fan curve to get your desired fan curve.
- Relieve your settings, and reboot your computer.
How to conform fan speeds using software
If yous use an older PC without a UEFI or desire a more than straightforward solution, you can utilise third-party programs to achieve the aforementioned result. The program used in this tutorial is SpeedTemp. However, programs like SpeedTemp may be unable to access your CPU fan depending on your motherboard manufacturer, so using the UEFI is superior in many cases.
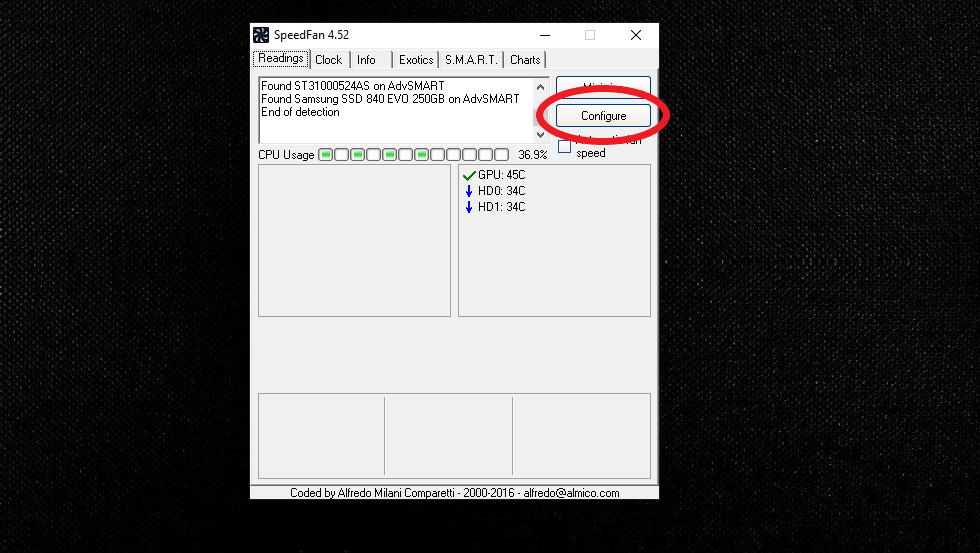
- Open SpeedTemp, and click the Configure box on the top right.
- In the configuration menu, caput over to Fan Control.
- Check the box next to Advanced Fan Control.
- Click on the Add box located on the right.
- Name the Fan Controller the group of fans y'all want to adapt.
- Select Controlled Speed.
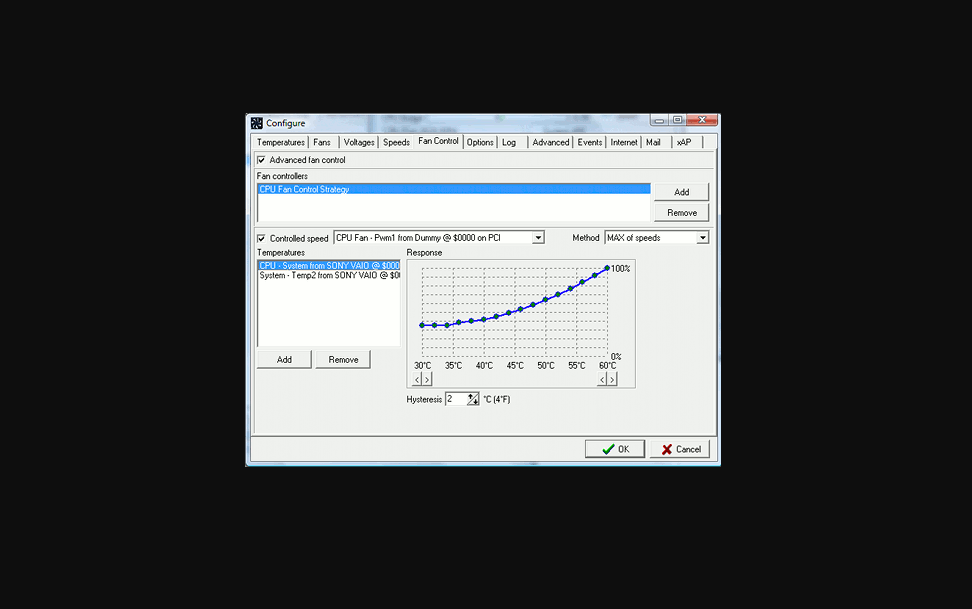
- In the drop-down, select the fan you desire to adjust.
- Pick Sum of Speeds.
- Click Add under Temperatures, then add the Temperature Probe for the hardware.
- Conform the graph to your liking.
- Click Ok, then go back to the main folio.
- Disable Automatic Fan Speed.
Benchmarking
In one case you've set your fans to your desired speeds, y'all should cheque them to ensure everything is working as intended. The simplest method to cheque is to use the UEFI. To do this, open up your UEFI and head to the Monitor section. From here you can inspect the fan speeds and temperature.

For more than advanced testing, like monitoring a CPU under load, you can utilize a temperature monitoring tool. A helpful tool for monitoring your PC's temperature and fan speeds is Open Hardware Monitor.
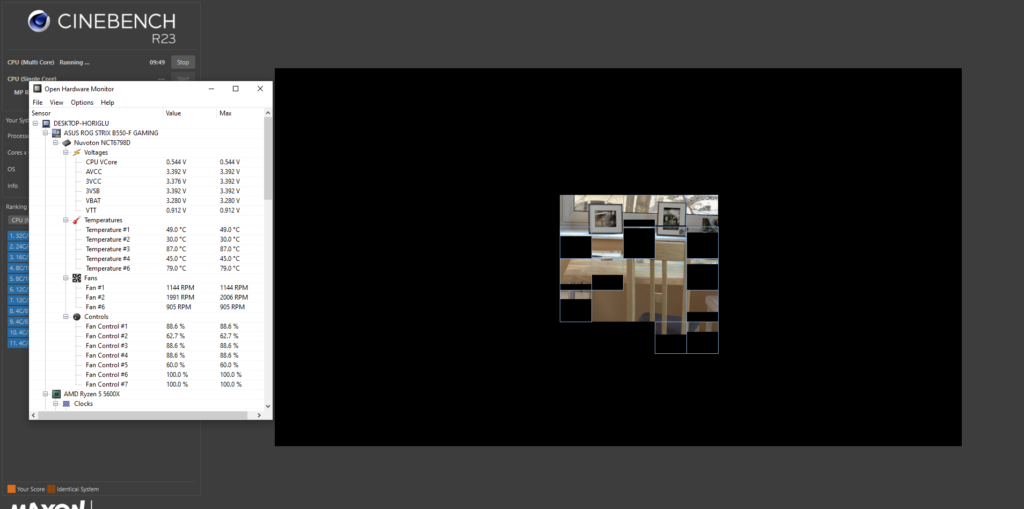
And if you lot desire to see how your PC reacts under stress, you can run a multi-core test in a benchmarking tool, similar Cinebench, while monitoring the temperatures and speeds with Open Hardware Monitor.
Source: https://dotesports.com/hardware/news/how-to-control-cpu-fan-speed
Posted by: porteryouss1994.blogspot.com
0 Response to "How To Check Fan Speed Windows 7"
Post a Comment